


How to Assemble Print at Home Patterns

Assembling your print at home pattern is very simple. All of our patterns come with a layered Print at Home PDF and a layered Copy Shop/A0 PDF. Layered simply means that you can view and print each size or layer at a time. This way you can print only your size if that works best for you. The PDF can also be printed with all sizes as well.
Step 1

Print your PDF centered on the page at 100% scale.
Step 2
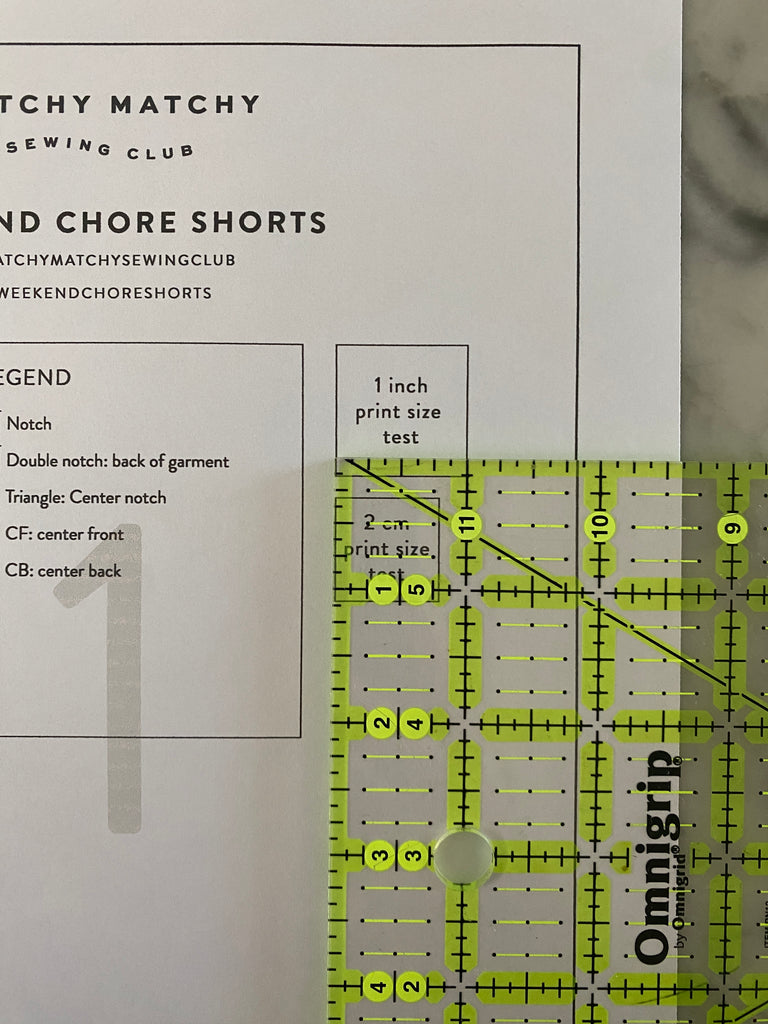
Measure the 1" or 2 cm box to ensure that your scale is correct. If these boxes are measuring correctly then the rest of your pattern will be to scale.
Step 3

Trim off the right and bottom sides of the paper at the outlined box.
Step 4

Match up the circled letters at the corners of each page.

Overlap the left page on top of the right page to cover the blank space outside of the outlined box and complete the circle with the matching letters. Tape together to secure.
Step 5

Continue taping and matching all of the pages in the row. Repeat these steps for the second row.

Match the second row to the first using the circled letters as a guide. Tape together to secure.
Step 6

Cut out the pattern pieces for your desired size!
17 comments
Hi. I purchased the Wave Float Top pattern yesterday and the “alphabet corners” have not printed on any of the pages.
———
Matchy Matchy Sewing Club replied:
Hi Caz! If the corners are not printing it sounds like the printer settings might need to be adjusted. Scaling should be set to 100% and the document needs to be center aligned. Please reach out to our team at hello@matchymatchysewingclub.com if you need additional help troubleshooting!
Trying to print All Day Culottes using edge browser on apple laptop, but layers/sizes option does not appear. Do your free patterns have this option??
———
Matchy Matchy Sewing Club replied:
Hi Joann! Yes, all of our PDFs contain layers with each size on its own layer. You will need to download the file from your browser to your desktop. Open the file with Adobe Acrobat to view the layers and simply click on the layer icon on the side panel or use the menu to navigate to View > Show/Hide > Navigation Panes > Layers. Click the eyeball icon next to each layer to hide or reveal. Once you have selected your size, you can print!
I purchased the matchymatchy book and trying to print the duster. On 100% the test square is more than one inch square and on actual size, the test square is 1” but the it does not match up. If I can contact u by email, I can send pics.
———
Matchy Matchy Sewing Club replied:
Hi Sheila! We just received your email, our team will help you troubleshoot!
Hi, I am trying to make the color block set, you’ve stated there is a chart for the bottom panels, and trim pieces. I printed the pdf, and there is not chart.
———
Matchy Matchy Sewing Club replied:
Hi Ashley! The chart for the bottom panels, cuffs, and bias pieces is on page 6 of the Sewing Instructions PDF. Please reach out to our team at hello@matchymatchysewingclub.com if you need additional help!
Thank you for offering free patterns. I am a beginner and I love to try new patterns it just so hard finding cute clothing for plus people…
———
Matchy Matchy Sewing Club replied:
Hi Veronica! We’re so happy you found our free patterns, we hope you enjoy them! Happy sewing :)